A loft conversion can add real space, but beginners often trip over the same three issues. Here is what to sort out before you call anyone. Most people start by browsing photos of beautiful bedrooms tucked under sloping ceilings. That is the fun part. The expensive part is everything underneath: the roof structure, the floor joists, the staircase position and the paperwork nobody warned you about. These loft conversions tips for beginners are written for homeowners who have never managed a building project and want to avoid the mistakes that push budgets past breaking point.
The good news is that a loft is often the cheapest place to find extra room. You are not digging foundations or building new external walls. The bad news is that a loft is also a strange, cramped, awkward space that was never designed for people to live in. Treat it with respect and it rewards you. Treat it casually and it becomes a money pit. The tips below are the ones that matter most in the first few weeks, before you commit to anything.
Check head height and structural limits before anything else
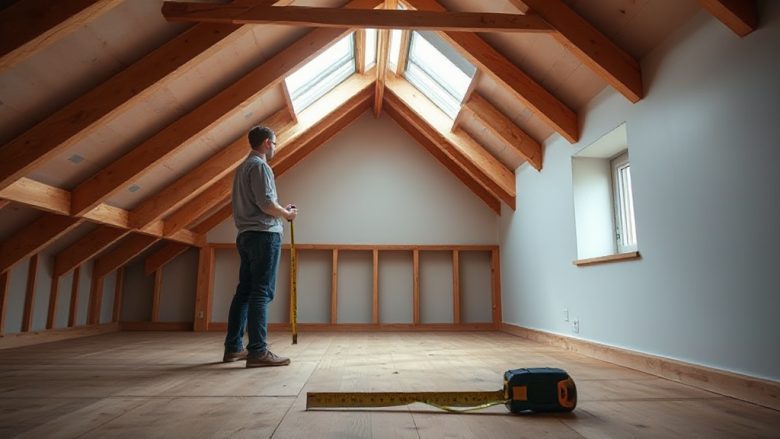
The first thing to measure is head height. Stand in the middle of your loft and measure from the top of the ceiling joists to the underside of the ridge. If that distance is under roughly 2.2 metres, a standard conversion becomes difficult and expensive. You may need to lower the ceiling in the room below, raise the roof, or accept a design with restricted headroom. None of those options are cheap.
Head height is not just about comfort. Building regulations require a certain amount of headroom on the stairs and in habitable rooms. If your loft cannot meet those minimums without major structural work, the project may not be viable. Measure carefully, and measure at several points, because old roofs sag and settle over time.
Next, look at the floor structure. The ceiling joists in most lofts were sized to hold up a ceiling and some insulation, not a bed, a bathroom and several people. A structural engineer will usually need to specify new floor joists or strengthen the existing ones. This is one of the most common reasons beginners get a nasty surprise on cost. The engineer’s report is not optional paperwork; it is the difference between a safe floor and a bouncy one.
While you are up there, check the roof itself. Is it in good condition? If the roof covering is near the end of its life, replacing it during the conversion is far cheaper than doing it afterwards. Look for signs of water ingress, damaged felt, or cracked tiles. A damp loft is a warning sign that needs fixing before any living space goes in.
Finally, look at the space itself. Chimney breasts, water tanks, boiler flues and awkward roof trusses all eat into usable floor area. A loft that looks big from the hatch can shrink dramatically once you subtract the bits you cannot build over. Sketch a rough plan and mark anything you cannot move. That sketch will save you hours of confusion later.
Planning permission basics most beginners get wrong
Many loft conversions fall under permitted development, which means you may not need a full planning application. That is good news, but it is not a free pass. Permitted development rights come with conditions, and those conditions are where beginners slip up.
Typical limits include how far you can extend beyond the existing roof slope, how high the conversion can sit, and how much of the roof can be covered by new windows or dormers. If your home is a flat, a maisonette, or in a conservation area, permitted development rights are often restricted or removed entirely. Listed buildings almost always need consent. Always confirm your position with the local planning authority before you spend money on drawings.
Even when planning permission is not required, building regulations approval almost certainly is. Building regulations cover structural safety, fire escape routes, insulation, ventilation, electrical work and the staircase. A loft conversion is a habitable room, so it must meet the same standards as the rest of the house. Your builder should handle the application, but you remain responsible as the homeowner. Ask who is submitting what, and keep copies of every approval.
Party wall agreements are another classic beginner trap. If your conversion involves work near a shared wall, you may need to serve notice on neighbours. This is not optional, and disputes can delay a project for months. Talk to your neighbours early, even before you have final drawings. A friendly conversation now is worth more than a formal notice later.
One more point that catches people out: if you live in a leasehold property, you usually need freeholder consent. Check your lease before you assume anything. Permission from the freeholder is separate from planning permission, and without it you could be forced to undo work.
Budget and timeline traps that catch first-timers
Almost every loft conversion costs more than the first quote suggests. That is not because builders are dishonest. It is because lofts hide problems. Once the floor is up and the roof is open, surprises appear: rotten timbers, undersized joists, old wiring, hidden chimneys. Budget a contingency of at least ten to fifteen per cent on top of your main figure, and treat that money as spent from day one.
Be clear about what the quote includes. Does it cover the staircase, the windows, the bathroom, the electrics, the plastering and the decorating? Some builders quote for the shell only, which leaves you to organise the rest. That can be fine, but you need to know so you can price the whole job honestly. Ask for a written breakdown, not a single number.
Timelines slip for predictable reasons. Structural calculations take time. Building regulations approval takes time. Window and staircase deliveries take time. If you are living in the house during the work, add extra weeks for the disruption. A typical loft conversion takes somewhere between eight and sixteen weeks on site, but the preparation before that can easily run to several months.
Watch out for the temptation to change your mind mid-build. Moving a bathroom, adding a window, or switching the staircase position after work has started is expensive and slow. Decide the layout properly before the first hammer swings. Every change order adds cost and delays.
Also think about the finished space. A loft bedroom needs heating, ventilation and plenty of insulation to be comfortable in both winter and summer. Insulation is not glamorous, but it is one of the best places to spend money. A cold loft in January and a sauna in July is a miserable outcome, and retrofitting insulation later is far harder.
Choosing a builder without getting burned
The builder matters more than almost any other decision. Get at least three quotes, and do not automatically pick the cheapest. A suspiciously low quote often means something has been left out, and you will pay for it later. Look for a builder with specific loft conversion experience, not just general building work. Lofts have their own quirks, and experience shows in the details.
Ask to see previous projects, and if possible, speak to past clients. A good builder will happily provide references. Check that they have the right insurance, including public liability cover. Ask who will manage the building regulations application and the structural calculations. Some builders handle everything; others expect you to arrange parts of it. Either is fine, as long as you know which one you are getting.
Get everything in writing. The contract should cover the scope of work, the price, the payment schedule, the start and finish dates, and what happens if things go wrong. Never pay a large deposit upfront. Staged payments tied to completed work protect you far better than handing over a lump sum.
Trust your instincts during the quoting process. If a builder is vague, slow to respond, or dismissive of your questions, that behaviour will not improve once work begins. Clear communication before the job is the best predictor of clear communication during it.
Five-point pre-project checklist
Before you commit to anything, work through this short list. It will not answer every question, but it will stop the most expensive mistakes.
- Measure head height and confirm the loft can meet building regulations without major structural changes.
- Get a structural engineer’s report on the floor joists and roof before you finalise any design.
- Confirm your planning position, including permitted development limits, conservation area rules, party wall duties and freeholder consent.
- Set a realistic budget with a contingency of at least ten per cent, and get written quotes that clearly state what is included.
- Choose a builder with loft-specific experience, check references and insurance, and agree a staged payment schedule in writing.
If you can tick all five, you are in a far stronger position than most beginners. If any one of them raises a red flag, pause and resolve it before spending money. A loft conversion rewards patience. The homeowners who end up happy are usually the ones who did the boring checks first, then enjoyed the exciting part afterwards.